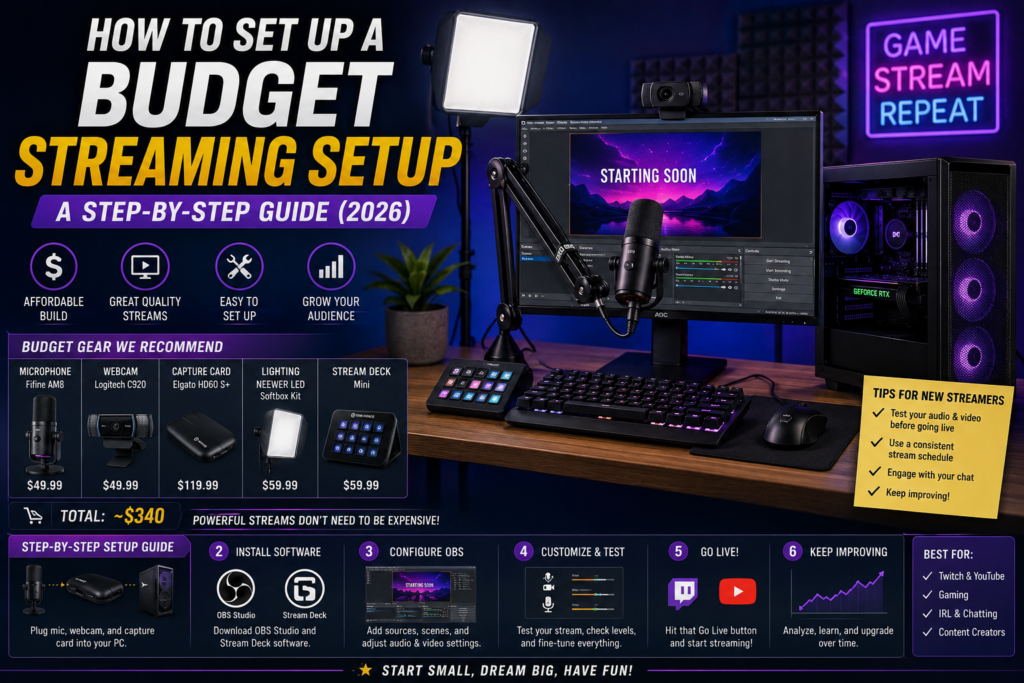
You don’t need a $2,000 studio to start streaming. The gap between a stream that looks amateur and one that looks genuinely professional comes down to a handful of specific upgrades, tackled in the right order — and most of them cost under $60 each. Here’s exactly what to buy, in the order it actually matters.
⚡ Quick Answer
- Fix audio first, always. Viewers tolerate rough video far more than they tolerate bad audio — a $40 USB mic is the single highest-impact upgrade on this list
- Lighting is the most underrated upgrade. A $60–100 key light does more for how professional your stream looks than a better webcam
- Your webcam matters less than you think. Good lighting makes a budget webcam look better than a great webcam in bad lighting
- Software is free. OBS Studio handles scenes, overlays, and streaming to any platform at zero cost — don’t pay for streaming software
🎤 Step 1: Fix Your Audio First
This is the step people skip and shouldn’t. Viewers will stick around through mediocre video quality, but muddy, echoing, or inconsistent audio drives people away within seconds — it’s consistently the number one complaint about new streamers’ setups, ahead of camera quality or lighting.
The 🛒 HyperX SoloCast is a genuine, no-compromise starting point: a cardioid USB condenser mic with 24-bit/96kHz recording, a tap-to-mute sensor with an LED indicator, and true plug-and-play setup — no audio interface, no drivers, no software required to get clean sound immediately.
- Position it correctly: 6–12 inches from your mouth, slightly off-axis rather than pointed straight on, to reduce plosive pops on words starting with “P” or “B”
- Set input levels in Windows before streaming: aim for your voice peaking around -12 to -6dB, not maxed out to 0dB, which causes distortion
💡 Step 2: Add a Key Light
This is the upgrade with the biggest visible impact per dollar that isn’t audio. Most rooms have uneven, yellow-tinted overhead lighting that makes any webcam look grainy and unflattering — no camera upgrade fixes bad lighting, but good lighting makes even a modest webcam look clean.
The 🛒 Elgato Key Light Mini is a genuinely popular pick for good reason — 800 lumens with an adjustable 2900–7000K color temperature range, app control from your phone or PC, and a compact footprint that clips onto a monitor or desk without needing a full lighting rig.
- Position it slightly above and in front of your face, angled down about 15–45 degrees, not pointed straight at the lens — this avoids flat, washed-out lighting
- Match the color temperature to your room’s ambient light (warmer ~3000K for evening/lamp-lit rooms, cooler ~5000–6000K for daylight) so your face doesn’t look tinted against the background
📷 Step 3: Your Webcam (You May Already Be Set)
If lighting and audio are solid, a budget webcam looks far better than most people expect. If you’re starting from a built-in laptop camera, this is worth prioritizing after lighting — but if you already own a decent USB webcam, don’t feel pressure to upgrade it before fixing audio and lighting first, since those two changes affect how good any camera looks more than the camera itself does.
We’ve covered specific webcam picks by budget and feature priority in a dedicated roundup on the site — worth checking if you’re starting from a laptop’s built-in camera.
🖥️ Step 4: Set Up Free Streaming Software
OBS Studio (Open Broadcaster Software) is free, open-source, and genuinely capable enough that many professional streamers use it exclusively — there’s no need to pay for streaming software at any point in a budget setup.
- Set up separate scenes (starting soon, live gameplay, BRB, ending) so transitions look intentional rather than jarring
- Add a noise suppression filter on your audio source (OBS includes this built-in via RNNoise) to clean up keyboard clicks and room noise even further
- Test your stream privately first using a platform’s private/unlisted stream option before going live publicly, to catch audio or video issues with nobody watching
🎛️ Step 5 (Optional): A Stream Deck for Scene Control
This is the one genuinely optional, higher-cost step on this list — skip it entirely if budget is tight, since nothing about a good stream depends on it. But if you find yourself fumbling for keyboard shortcuts to switch scenes or mute your mic mid-stream, a dedicated macro pad solves that friction entirely.
The 🛒 Elgato Stream Deck MK.2 offers 15 customizable LCD keys that can trigger scene changes, mute your mic, or control your lights with a single tap, with plugin support for OBS, Twitch, YouTube, Discord, and most other tools in this guide.
💰 The Shopping List
| Step | Pick | Priority | Price |
| Audio | 🛒 HyperX SoloCast | Do this first | ~$40–50 |
| Lighting | 🛒 Elgato Key Light Mini | Do this second | ~$60–100 |
| Webcam | See our webcam guide (link below) | If starting from a laptop cam | Varies |
| Software | OBS Studio | Free — no purchase needed | $0 |
| Scene Control | 🛒 Elgato Stream Deck MK.2 | Optional / later upgrade | ~$130–150 |
Prices fluctuate with Amazon deals — check the live listings for current pricing.
❓ Frequently Asked Questions
What’s the single best upgrade if I can only afford one thing?
The microphone, without question. Viewers forgive average video far more readily than they forgive bad audio, and a $40 USB mic is a dramatic improvement over a headset mic or laptop microphone.
Do I need a green screen to start streaming?
No — a green screen is a cosmetic choice for background removal, not a functional requirement. Good lighting and a tidy background behind you accomplish most of what people actually want from their stream’s visual presentation, without the setup complexity of chroma keying.
Can I stream with just a laptop and no extra hardware at all?
Yes, technically — but audio quality from a built-in laptop mic is the first thing that will hold back how professional your stream feels, even before webcam quality becomes a factor. If you can only buy one thing before starting, make it the microphone.
Is a capture card necessary for PC streaming?
No — capture cards are for capturing footage from an external source like a console. For PC gameplay, OBS captures your game directly from the same machine with no additional hardware required.
🔗 Related Reading
⚔️ Final Verdict
Build this setup in the order above, not all at once. Audio and lighting alone will take a stream from looking amateur to looking genuinely intentional, for well under $150 combined — and both changes make everything after them (your webcam, your background, your overall presentation) look better by association. The stream deck and any further gear are genuine nice-to-haves, not requirements to start.
As an Amazon Associate, PC Wizard Hub earns from qualifying purchases made through the links above.